Despite what some people might say, there are no easy 14ers.
Unless you spend a substantial portion of your life at very high elevation, nothing over 14,000 feet (4267 m) is ever going to be easy.
But there are easier 14ers and, by most accounts, Mount Sherman is one of them. If you can make it to the Fourmile Creek Trailhead – any car with some clearance should be able to if the road is dry – it’s only about a 5 mile (8 km) roundtrip hike with 2100 feet (640 m) of elevation gain.
So for me, Sherman was an ideal first 14er of the 2024 season.
I left home well before sunrise and arrived at the trailhead to find – to my surprise – plenty of parking. In fact, the lot never filled while I was there, which was unexpected given how popular the 14ers have become. Especially an easier one like this. Not that I’m complaining. The relative solitude was nice. I even had the summit to myself for a few minutes!
(Spoiler alert: I did, in fact, make it to the summit.)
To be honest, though, there were moments I wasn’t sure I was going to make it.
First, I was only 30 minutes into the drive when the low tire pressure light came on. Not what you want when you’re about to drive 12 miles (19 km) on a bumpy gravel road. I pulled into the next gas station and topped up all the tires. The light didn’t go off.
If you’ve followed me for a while, you know I have a lot of driving anxiety thanks to the number of times cars have stranded me on the side of the highway with no warning. So this, obviously, kicked that anxiety into high gear. I called my husband, and he talked me down and assured me I was okay to keep going. Nonetheless, I spent the entire rest of the drive worried about getting a flat tire, and I nearly turned around at least a dozen times.
The road to the trailhead, thankfully, wasn’t that bad. I easily made it in the Subaru, and there was even a sedan parked at the trailhead (though I suppose this raises the question of can vs. should).
Anyway.
It was only about 40°F (4°C) so I donned my hat, gloves, and down vest, and threw my puffy jacket into my backpack just in case. I also had microspikes and hiking poles with me, as it was mid-June and the route was not yet completely snow-free.
My hike began in a straightforward fashion as I walked a short distance up the road to the gate marking the trailhead. On the other side of the gate, the road continues for another 0.2 miles (0.3 km) and about 200 vertical feet (60 m) to the remains of the Dauntless Mine.


It was at this point that I had my second series of moments in which I was questioning my ability to complete this hike. I was only 0.4 miles (0.6 km) in, and already I was breathing heavily. Granted, I’d also gained 350 feet (105 m) of elevation. Hikes that start out immediately uphill always seem to kick my butt right off the bat.
Thankfully, the incline was a little more gradual beyond the mine and I was able to catch my breath a bit. As I made my way along this section of trail, I watched a few ptarmigans frolic on the patches of snow. They were about halfway through the transition from winter to summer plumage, giving them a very mottled appearance. Unfortunately, they were too far away to capture on camera.

Truthfully, the most challenging part about this first section of the hike isn’t even the elevation gain. It’s staying on the trail. There are multiple old mining roads through the area and no signs pointing you in the right direction. There are some rock lines and cairns to help guide you, but you have to look carefully. Prior to climbing 14ers, I always make sure to download the route description from the website and save the photos for offline use so I can check my route if necessary. It definitely came in handy here.

Just below 13,000 feet (3960 m), after following the trail up and around numerous curves, I came upon the remnants of the Hilltop Mine.


From here, I could also see the remainder of my route… and the snow I’d have to navigate to reach the saddle between Mount Sherman and the adjacent Mount Sheridan.

At this point, I pulled out my hiking poles for some extra balance and stability and ended up using them for the remainder of the hike. I didn’t end up needing my microspikes, though, thanks to the hard-packed snow and the steps that had been pretty thoroughly kicked in by previous hikers. However, in warmer weather and/or with softer snow, I could see this section being slippery and challenging to navigate.

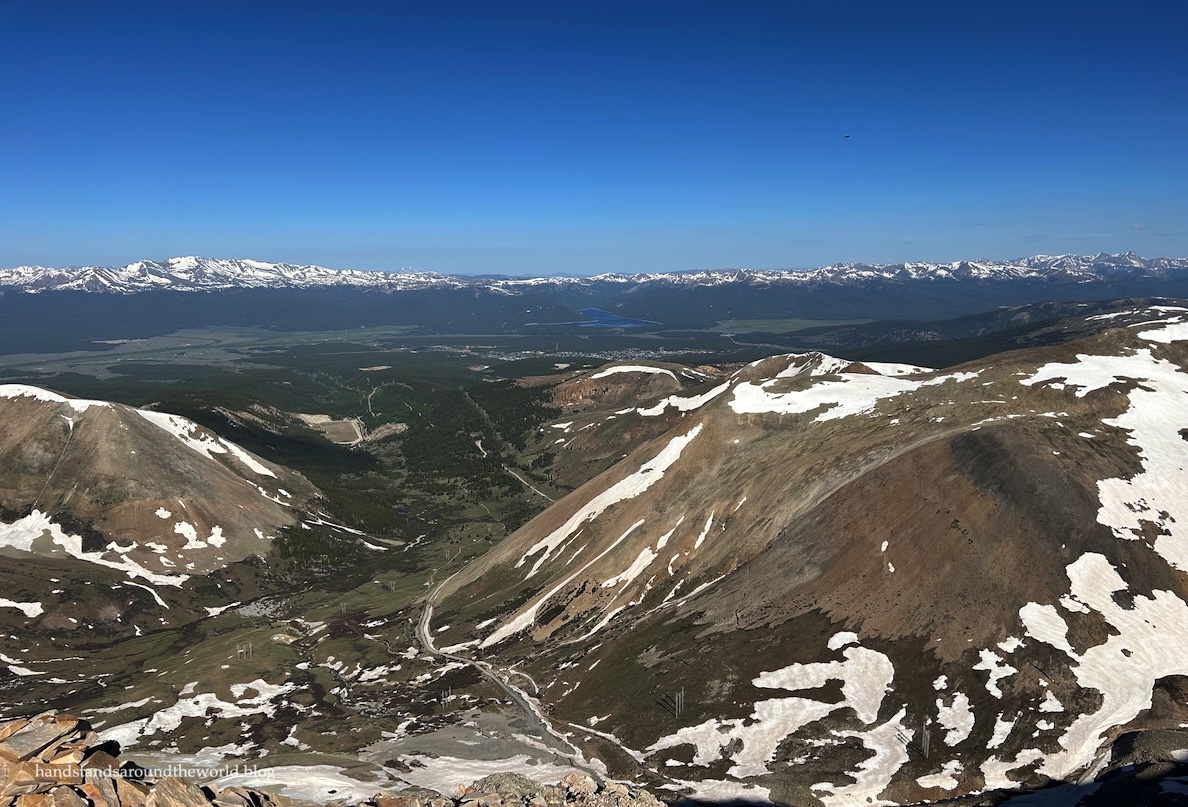
Once I was up to the ridge, it was just rocks, rocks, and more rocks for the remaining 1.2 miles (2 km) and 900 vertical feet (275 m) to the summit. In that regard, it wasn’t super exciting. However, I did have some nice views to the west now, and the final section of ridge is substantially narrower and a little more fun to navigate.


I was thankful for the relatively calm winds on the narrower section. I’ve been pushed off balance by Colorado mountain winds more than once; I wouldn’t want to be on this stretch on a gusty day.

Beyond this narrow section, it’s just one final climb and then a mostly flat walk across to the summit.

I arrived to find only five other people on the summit, so there was plenty of space to take photos and then find some solitude. The wind was picking up a little, but thanks to some rock windblocks, I was able to enjoy the summit for about 20 minutes before beginning my descent.


It was a pretty straightforward hike back to the car. The only obstacles were some loose rocks on the ridge and then the snow, which was thankfully still firm enough for me to safely descend. Some people opted to butt-slide down the snowfield, but since I was hiking solo I decided it wise to not take unnecessary risks. It looked fun, though!
In total, it took me 2 hours to reach the summit and about 1.5 hours on the descent. When I made it back to the car, all four tires were fully intact.
(As we would learn later that week, though, there were two nails embedded in one of them and it was slowly leaking. Unfortunately, it was the kind of leak that couldn’t be fixed, so we now have brand new tires.)
And to top it off, I saw a moose on the way back down the road.

Despite my earlier worries, it had been a good day. My 14th Colorado 14er – the first of 2024 and my 3rd solo 14er summit – was a success!
Up next: summiting the non-14er Saint Vrain Mountain
The Important Stuff:
- Getting there: Fourmile Creek Trailhead is located at the end of Fourmile Creek Road (Co Route 18) just south of Fairplay, Colorado. You theoretically could get close to the trailhead in a sedan if the road is dry and you’re experienced with navigating rough roads, but I personally wouldn’t have taken my sedan up it. I had no issues in our Subaru, though.
- Fees and passes: none.
- Hiking: from the uppermost parking area, roundtrip distance is approximately 5 miles (8 km) with 2000 feet (610 m) of elevation gain. From slightly lower, where most people park, it ends up being about 5.2-5.5 miles (8.4-8.9 km) with 2100 feet (640 m) of gain.
- Route: a complete and detailed route description can be found here. Before heading off on this hike, download the 14ers.com app and save the text and photos for offline use.
- Where to stay: with an early start, this can be done as a day hike from the Front Range, or from towns in the Clear Creek, Park, or Summit County areas. There are a couple campgrounds along Fourmile Creek Road. You can also sleep in your car or pitch a tent at the trailhead, but there is a lot of private property around the road, so be sure to obey all signage. You can also start on the other side of the mountain at Iowa Gulch (more information on that route here).
- Other: There’s no bathroom at the trailhead, and not exactly a lot of privacy; whether you’re spending the night or just day hiking, be sure to throw some toilet paper, hand sanitizer, Kula cloth, and a WAG bag in your car.
Leave a Reply to leightontravelsCancel reply