If you do a google search for “most scenic roads in the USA,” Going-to-the-Sun will probably be on the list. If you do a google search for “most scenic roads in Montana,” Going-to-the-Sun will definitely be on the list. Out of curiosity, I just googled “most scenic roads in the world,” and Going-to-the-Sun even popped up on some of those.
Clearly, the general consensus is that Going-to-the-Sun is pretty epic.
Constructing Going-to-the-Sun Road – abbreviated from here on out as GTSR – was a nearly two-decade effort that involved surveying the rugged landscape (which often required rock climbing just to get there) and identifying possible routes. Multiple options were proposed; the director of the National Park Service at the time – Steven Mather – ultimately supported the plan that fit most seamlessly into the landscape, even though it was neither the cheapest nor easiest to construct. I’m grateful that he did, because aside from a thin line across the mountainsides, the lovely scenery has been left mostly unobstructed.
Turning this plan into a two-lane highway, though, took an incredible amount of manual labor. Bridges, guard rails, and retaining walls had to blend into the landscape, and so were built from the rock that was removed to create the roadbed. Two tunnels needed to be blasted through the mountainside; the 408 foot (125 m) long eastside tunnel and the 192 foot (59 m) long westside tunnel. Crews could excavate roughly 5 feet (1.5 m) per day, so you don’t even really have to do the math to see that construction took a long time. Equipment to haul out the removed chunks of rock couldn’t reach the area, either, so it was all carried out by hand.
In the end, it took twelve years from the start of construction for the road to be completed. It was opened to the public in July 1933.
Today, GTSR is recognized as a National Historic Landmark and Historic Civil Engineering Landmark, and it’s easy to see why. Each time the road curves, you can look back and see how it has been cut into the mountainside.


GTSR is the only road that transects Glacier National Park, entering from the west at Apgar, ascending up and over the Continental Divide at Logan Pass – elevation 6646 feet (2026 m) – and descending to St. Mary on the park’s eastern border. Despite the fact that it’s only about 50 miles (80 km) long, driving it can easily be an all-day adventure. If you only have one day to spend in Glacier, traveling the length of the road and stopping to see as much as you can would be my recommendation.
This post is essentially going to be a jam-packed one-day itinerary for GTSR, though you could easily spread it out over two days as well. For a less busy day, you can pick and choose the things that sound most appealing.
Things to know
I previously wrote a post with the details of visiting Glacier National Park and accessing GTSR, so I’m just going to do a quick overview here:
- During most of the summer season, you need to book (in advance) a vehicle reservation for GTSR.
- Without stopping, it will take a minimum of 2-3 hours to travel from one end to the other.
- The road is steep, narrow, and curvy; vehicles or vehicle+trailer combos over 10 feet (3 m) high or 21 feet (6.5 m) long are not allowed.
- The road has no shoulder, few guard rails, and steep drop-offs; if you don’t like heights or exposure, this may not be the drive for you.
- If you don’t want to drive the road yourself, have a vehicle that’s too large, or simply don’t want to deal with the chaos of finding a place to park, you can take the free park shuttles along the entire length of GTSR instead.
- If you decide to take the shuttles, aim to catch the first one of the day and pay close attention to the time so you don’t miss the final return trips.

St. Mary
For this itinerary, we’re going to enter the park on the east side. This is the less popular direction of travel, but by going this way the sun will be in a more favorable position for photos and you may be able to avoid the crowds a little. For best results, start as early as possible.
If you collect NPS passport stamps, begin with a quick stop at St. Mary Visitor Center. If you’re planning to take the shuttle, this is where you’ll catch it. They depart roughly every 15 minutes from 8:00am-7:00pm. Otherwise, continue up the road from here.

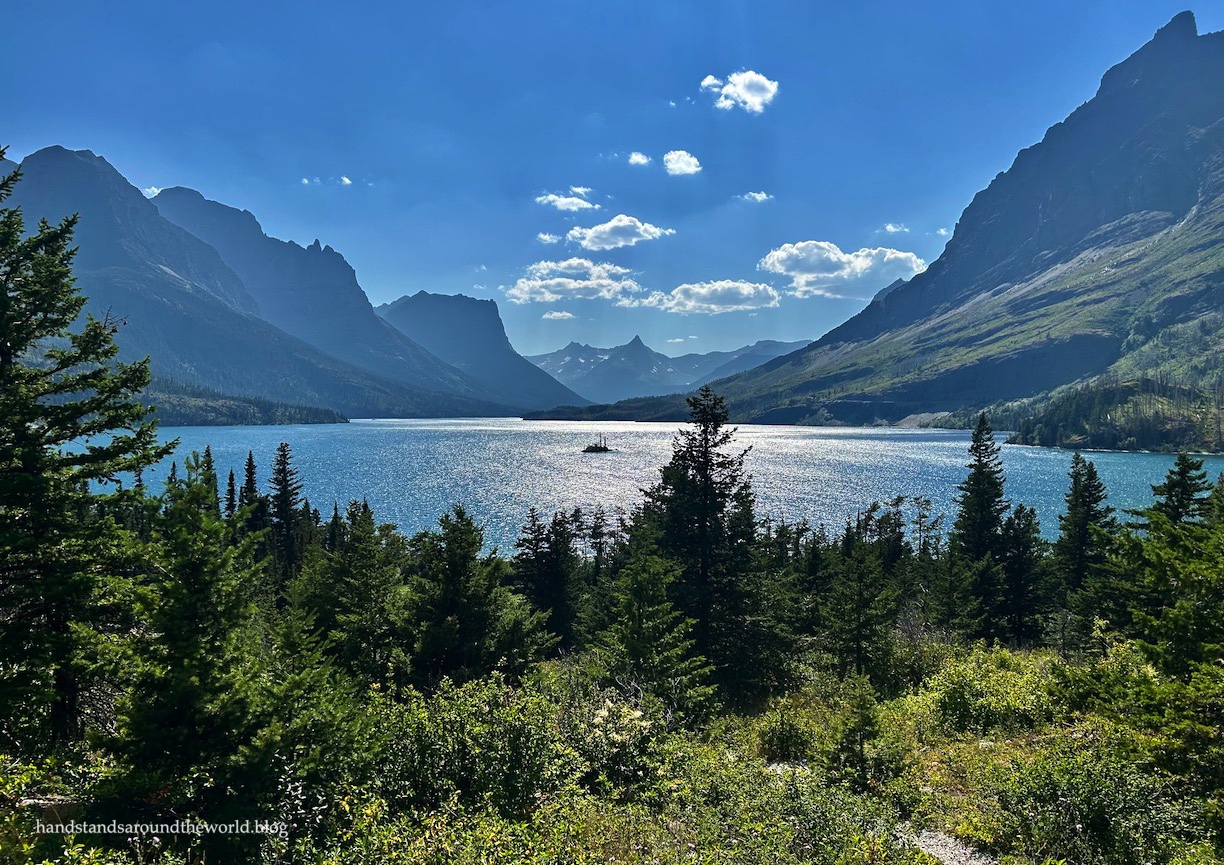
GTSR parallels St. Mary Lake for the entirety of its 10 mile (16 km) length. Thanks to the 2015 Reynolds Creek Fire, which wiped out much of the forest in the St. Mary Valley, you can now see quite a bit of the lake from the road.


Our first stop is at Wild Goose Island Overlook, which is actually the most photographed location in Glacier – for good reason. It’s also apparently the location of the opening scene in The Shining (which I haven’t seen, so I can’t confirm this). Note that the shuttles don’t stop here, so you’ll need to have your own car for this one.


Just a short distance up the road is Sun Point, which is a good place to stretch your legs with a short walk out to this rocky overlook. This is also a nice place to return to at the end of the day for an evening picnic or to watch the sunset. The shuttles stop here.

Three Falls Hike
Hop back in your car or catch the next shuttle and continue up the road to the St. Mary Falls Trailhead and shuttle stop… and get ready for your first hike of the day! When people are looking for shorter and/or less strenuous hikes, this is one of my favorite recommendations because you get a lot of bang for your buck. In just 5 miles (8 km) with about 600 feet (180 m) of elevation gain, you get to see three waterfalls plus some wonderful views of Saint Mary Lake.
(That being said, this itinerary contains 3 hikes that total about 13 miles (21 km), so unless you’re feeling particularly ambitious, choose just 1-2 of them.)
This trip was the first time I’d hiked this trail since the Reynolds Creek Fire, and it’s noticeably different. The forest burned pretty thoroughly, so where once there were trees and shade, now there are sunshine and views. The downside is that it was really hot. The upside is, well, views!

You can also begin this hike from a parking area a short distance east of the trailhead/shuttle stop, but I recommend starting from the shuttle stop, for reasons that will become clear shortly. From here, the trail heads south to a four-way junction. Continue straight, following signs for St. Mary Falls. In a little under a mile, you’ll see a pretty bridge across the creek. St. Mary Falls is just behind it.


After enjoying waterfall #1, continue up the trail as it begins to gradually gain elevation along Virginia Creek. There are a few unnamed waterfalls here, all easily visible from rock outcrops right next to the trail.


The main destination, though, is Virginia Falls, located about 0.8 miles (1.3 km) beyond St. Mary Falls. There’s a lower and an upper viewpoint, and I recommend climbing the extra distance to the upper one. Especially on a hot day, this is a nice place to find some shade. If the falls is flowing well, you’ll also probably get sprayed with some refreshingly cool water.


From here, retrace your steps back to St. Mary Falls and then the four-way junction. If you took the shuttle, or parked at the shuttle stop, turn right here and follow the trail east along St. Mary Lake. Continue for a little over 1 mile (1.6 km), all the way down to the shore, and then turn left and climb a short distance up to Baring Falls.


From here, climb back up to GTSR, following the trail under the road to the small but scenic Sunrift Gorge.


Then, catch the next westbound shuttle back to your car (it’s about a 3 minute ride), or simply continue on the shuttle toward Logan Pass. Three Falls Hike, complete!
Hike stats: 5 miles (8 km) round-trip, with 640 feet (195 m) of elevation gain.
Logan Pass and Hidden Lake
The shuttle makes a couple other stops on the way up to the Continental Divide. Jackson Glacier Overlook might be worth a quick stop, as it’s one of the more unobstructed – but still distant – views of a glacier.

Otherwise, continue up GTSR to its high point at Logan Pass. If it’s after 7:00am, the parking lot will be full. Another advantage to taking the shuttle… we didn’t have to worry about parking and could immediately begin our next hike.
After a brief stop at the Logan Pass Visitor Center for my passport stamp, we joined the unavoidable crowds on the Hidden Lake Overlook Trail, which travels about 1.4 miles (2.3 km) through a lovely alpine meadow up to the overlook of Hidden Lake. This is one of the most popular hikes in the park, and the crowds can absolutely be off-putting, but in my opinion this is one of those things where you have to just suck it up. It’s worth it. Logan Pass is truly the centerpiece of the park, and this is a hike you shouldn’t skip.


From the overlook, the trail continues sharply downhill to Hidden Lake, though it’s frequently closed due to bear activity. In fact, I think it’s been closed every time I’ve been here.
This area is also frequented by mountain goats. As we set off on our hike, I told my husband there was probably a 98% chance we’d see goats up at the overlook. I’ve never not seen them here. Well, apparently this was the 2%, because we didn’t see a single goat. We did see a couple dozen bighorn sheep, though.

I’ve hiked to Hidden Lake in July, August, and September, and the weather has ranged from sunny and warm to foggy with snow covering parts of the trail. Here are some photos from previous hikes.


Hike stats: 2.8 miles (4.5) round trip with 590 feet (180 m) of elevation gain.
The West Side
After enjoying the alpine beauty of Logan Pass, it’s time to head down the west side of GTSR (be sure to catch the westside shuttles to Avalanche). As curvy and winding as you thought the east side was, it pales in comparison to the west side. Large shuttle buses can’t be used on this section because the curves are too tight to navigate.
There aren’t many shuttle stops on the west side, so mostly this section of the trip is about enjoying the views. The west side of Glacier is the busier side, and I often see it labeled as the best half of the park. I will vehemently defend the east side of Glacier until the day I die – Many Glacier and Two Medicine are on the east side, after all – but I will concede that the west half of GTSR has more dramatic views than the east.


Avalanche Lake and Trail of the Cedars
The first shuttle stop on the west side is The Loop, which is a pickup point for hikers who just finished the Highline Trail. No need to get off here. Next up is Avalanche/Trail of the Cedars. If you still have the time and energy, this is the final hike of the day. Cross the road to the trailhead and follow signs for Avalanche Lake.
Trail of the Cedars is a 0.5 mile (0.8 km) accessible loop through a forest of towering cedar and hemlock trees. It connects to the Avalanche Lake trail; you can start at either side of the loop, walk half of it, head up to the lake, and then walk the other half back to the trailhead.


I’m going to be honest: Avalanche Lake is not my favorite hike in the park. It’s a much lower and less scenic lake by comparison, and it’s extremely popular. There must have been 400 people on the trail with us. That being said, my opinion is influenced by my bias toward brightly-colored alpine lakes, and I’m fortunate enough to be able to hike steep trails many miles into the backcountry. For someone who has never been to a place like Glacier, or who can’t hike the longer or more challenging trails in the park, this is absolutely a hike that’s worth doing.


Also, Avalanche Gorge is neat!


The path is not wheelchair accessible beyond Trail of the Cedars, and there are ups and downs and some rocks on the trail, but if you want to hike to a lake in Glacier, this is the least strenuous place to do so.
Hike stats: 5 miles (8 km) round trip, including the full Trail of the Cedars loop, with 710 feet (215 m) of elevation gain.
Lake McDonald and Apgar
And finally, continue west on GTSR (catch the westbound shuttles to Apgar) to the largest body of water in Glacier: Lake McDonald. The shuttle stops at Lake McDonald Lodge and village, and ultimately terminates at Apgar, located at the west end of Lake McDonald. Some of the best views of the lake can be found here, as well as lodging and amenities. There’s also a visitor center here with a passport stamp.


If you planned a one-way drive across GTSR, you’ve now made it to the end! If you need to head back to St. Mary for the night, it’s time to turn around and re-trace your steps. If you’re taking the shuttle, you’ll need to depart Apgar on an eastbound shuttle no later than 4:15pm. The last shuttle from Logan Pass back to St. Mary – remember, you have to transfer at Logan Pass – leaves at 7:00pm.
And there we have it.
Driving GTSR: complete!
Up next: a bucket list hike on the Highline Trail
Here is a trail map of the St. Mary area and here is one for the west side. I also recommend downloading the NPS app and saving Glacier National Park for offline use. You will be able to use the map in the app to track your location.
For more information on visiting Glacier National Park and how to access the GTSR corridor for this itinerary, please see this post.
Leave a Reply to RebeccaCancel reply