One really nice thing about Arches National Park is that many of the arches are easily accessible. A couple can be seen from the road, and a handful of others can be reached via a short, relatively flat and easy walk.
But way up in the northernmost reaches of the park is a trail to a collection of harder-to-reach arches. It takes some commitment, particularly if you plan to hike the entire thing, but it’s absolutely worth the effort. In fact, I’d argue this trail has the most bang for its buck of any in the park.
The Devils Garden Trail is a lollipop loop with a bunch of side trails out to the various arches. The park information lists the loop at 7.9 miles (12.6 km) with about 1050 feet (320 m) of elevation gain, though the exact distance will vary based on how many side trails you take. We took them all, and my hiking tracker clocked it at just under 9 miles (14.5 km).
The hike begins at the Devils Garden Trailhead, located at the end of the park road. We arrived around 8:15am the day after Thanksgiving to find the parking area nearly empty. However, by the end of the hike it was almost completely full.
There was frost on the ground as we set out, patches of snow and ice lingered from the recent winter storm, and much of the trail – including the very beginning – was in the shade. It was a chilly start. Sometimes I forget how cold it can be in the desert.

The first side trail is just 0.2 miles (0.3 km) in, branching off to the right to Pine Tree Arch and Tunnel Arch. Tunnel Arch is viewed from a distance, while the trail leads right up to the base of Pine Tree Arch. This side trip is about 0.5 miles (0.8 km) roundtrip.


We retraced our steps back to the main trail, keeping left at the next fork as we continued along the mostly flat sandy path for about 0.6 miles (1 km) to Landscape Arch. This is one of the longest span arches in the world, coming in at 290 feet (88 m). It’s also very thin; at its narrowest point, the span is only about 6 feet (2 m) thick.

When my mom first visited Arches back in the 1980s, the span was much thicker and you could walk right up underneath it. However, in the 1990s, multiple slabs broke off the underside of the arch and the park permanently closed that part of the trail. Today, you can view the arch (and the vehicle-sized boulders that fell from it) from a safe distance.
As the longest arch in the park and one of the most famous, Landscape Arch is the most visited on this trail, and many people simply hike this far and then return to the trailhead. If you do plan to continue, be sure you have food, water, shoes with good traction, and all your other hiking gear. The terrain becomes much more challenging beyond this point.
From here, the trail begins an ascent of a sandstone rock fin. It’s wide and flat and not too steep, but it’s a decent preview of what’s to come. If this stretch of trail makes you uncomfortable in any way, I do not recommend continuing this hike. There is a lot more slickrock, heights, exposure, and navigation to come.

The trail eventually flattens and turns sandy, and we actually got a little off track here because the path wasn’t very well marked. Thankfully, I was able to use my GPS app to lead us back to the path.
While I’m on the topic of staying on the trail, much of the ground at Arches is made of a living soil ecosystem called cryptobiotic crust. It’s reddish, often with black on the top, and has a texture similar to popcorn. It’s also very fragile, so it’s important to avoid stepping on it. If you have to step off trail for any reason, try to step only on rocks.
Back on the trail now, we reached the junction for Navajo and Partition Arches. Both Arches are well worth the side trip; the view from Partition Arch is really pretty. Meanwhile, Navajo Arch is my favorite of this entire hike. This side trip is about 0.9 miles (1.4 km) roundtrip.


Back on the main trail once more, we were met with quite a lot of sandstone and, therefore, scrambling. This next section is the high point of the trail, and the views are really good!


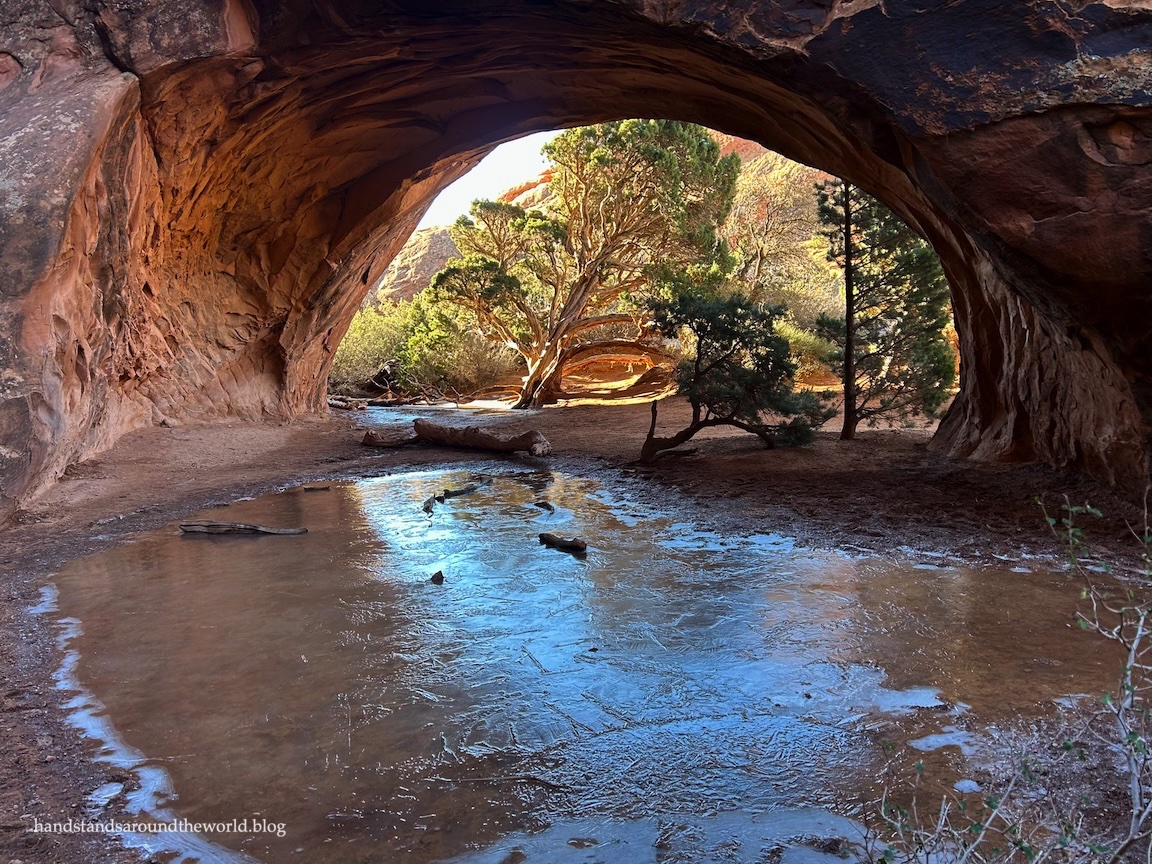
About halfway along this stretch is Black Arch Overlook. The arch is visible in the distance, and actually looks more like a cave thanks to the tall rock wall behind it that casts it in shadow.

For us, the scariest part of the hike was up next: the short climb up and over to Double O Arch. On an average day, this section would have been some not-so-difficult scrambling. However, we were just three days after a snowstorm, and this section of trail was almost entirely in the shade, which meant the rock was still partially snowy and icy. Thankfully, there was just enough dry rock to scooch on through, and after some very slow and careful butt-scooting and crab walking, we made it!


The trail drops down the back side and over to Double O Arch, which is the only vertically stacked arch I’ve ever seen.

From here, there are two forks. Left leads out to Dark Angel, which is not an arch, but rather a lone, dark colored pinnacle. It was fine… but far from the most impressive feature in Arches. If you’re tired or short on time, skipping this would be a way to shorten this hike by about 0.8 miles (1.3 km).


The views from the trail were nice, though.

Back at the fork, we went right this time onto what is (rightfully) called the Primitive Loop. It’s not well-marked and it’s much more rugged. It’s also neat!

We caught a glimpse of Top Story Window (visible in the photo above) just prior to the turnoff for Private Arch, which was not fully marked. There was a trail sign directing hikers to the continuation of the Primitive Loop, but there was nothing pointing to the Private Arch offshoot. For the record, the trail is behind the sign. It began with a quick scramble, and then was a fairly easy 0.3 mile (0.5 km) walk out to Private Arch.

Back on the Primitive Loop once more, it was time to navigate more sand, more slickrock, and the final challenge of the day: water. Thanks to the recent snow, large puddles had accumulated in low spots on the trail. The first few were avoidable with some relatively easy scrambling. In fact, we made pretty good time through this part… right up until we arrived at the Box Arch viewpoint.


The trail is not well-marked through here. In fact, it wasn’t marked at all, and it took us a while to realize we needed to go up and over the viewpoint and butt scoot our way down the other side. It was really slippery in places, particularly with wet sand on the soles of our hiking boots.


And little did we know, a final obstacle awaited us, just 15 minutes down the trail: one last puddle. This one, however, would prove more difficult to navigate. The logs on top might have looked promising from afar, but they were floating in the knee-deep water and therefore not a viable route. The only options were to scramble up and around… or walk right through.
It was 40°F (4°C) out. Under no circumstances would I be submerging any part of my body in ice water. With a running start, though, I was confident I could make it up the sandstone wall. My husband chose this option as well.
My mom, on the other hand, took one look at the climb and decided under no circumstances would she be attempting it. So off went her hiking boots, up went her pantlegs, and into the ice-cold water she went.


After that, everything else felt like smooth sailing. And for the most part, it was. There was a little more slickrock, some short ups and downs, and then a mostly sandy walk along the eastern edge of Devils Garden. The Primitive Loop rejoins the main trail just past Landscape Arch, and then it was just a short walk (0.7 miles/1.1 km) back to the trailhead.

We arrived at the car about 5 hours after setting out, feeling tired but very accomplished. Despite the challenges, this was a really fun hike, and I would absolutely do it again!
The Important Stuff:
- Getting there: Arches is located off of US Highway 191, 5 miles (8 km) north of Moab, Utah. Once in the park, follow signs to Wolfe Ranch and Delicate Arch.
- Fees and passes: Entrance to the park is $30 per car for a 7-day pass; America the Beautiful Passes are accepted. To enter the park from April-October between the hours of 7:00am-4:00pm, you will also need a timed-entry ticket. These must be reserved in advance. If you have a campground reservation inside the park, you are exempt from this requirement but must have a copy of your reservation to show at the entrance station.
- Hiking: Roundtrip distance with all the side trails is about 9 miles (14.5 km) with 1050 feet (320 m) of elevation gain. See this page for out-and-back distances to individual arches. Beyond Landscape Arch, this is a very difficult hike that should only be attempted if you have shoes with good traction, proper hiking gear, know how to navigate a trail that isn’t always well-marked, and are not afraid of heights, exposure, or scrambling.
- Where to stay: Devil’s Garden is the only campground in the park (51 sites, no hookups, reservations necessary from March-October), but there are many camping options ranging from primitive to full hookups in Moab and the surrounding BLM land. Moab has hotels, cabins, and hostels as well. Reservations are required for most of these options, but BLM campgrounds are first-come-first-serve.
- Other: We hiked the loop in a clockwise direction, and based on the number of hikers we encountered, I’d say that’s the more popular option. However, since I haven’t hiked it counterclockwise, I can’t speak to the difficulty of navigating the scrambling sections in the opposite direction. I imagine both directions have their challenges.
Leave a Reply to Midwest MarkCancel reply